Want to make something cute with those holiday fabric scraps? Make a little gift pocket that you can hang on your tree to hold money, candy, or miniature ornaments:
Showing posts with label decorations. Show all posts
Scrap Buster: Gift Pockets!
Want to make something cute with those holiday fabric scraps? Make a little gift pocket that you can hang on your tree to hold money, candy, or miniature ornaments:
Labels:
bags,
Christmas tree decorations,
decorations,
sewing,
tutorials,
wrapping
Christmas decorations
I just wanted to share with you my 'new' Christmas decorations, which I used to decorate my Christmas non-tree.
This one is a Danish style star made from old maps. I love the vintage feel of it. You can see the non-tree and the other ornaments on Grey Duckling.
Labels:
decorations
Homemade Salt Dough Decorations (inc Tutorial)
I wanted to have a go at these last year but time ran away with me! It's such a traditional craft that puts me in mind of the autumn harvest festivals at church when I was little. But I think salt dough lends itself to all sorts of things. (Loads more info here) It's kind of like a store cupboard Fimo!
For the Salt Dough You'll Need: 2 cups of Plain Flour, 1 cup of Table Salt, 1 cup Water (cool but not cold). Mixing bowl, rolling pin, cookie cutters, palette knife, baking tray, greaseproof paper, cooling rack.
You can mix up any amount of dough you like as long as you stick to this ratio. 2 parts flour to 1 part each of salt and water.
Method: Mix the flour and salt in a bowl. Make a well in the centre and pour in a little of the water and mix. Keep adding the water a little at a time, (You may not need all of the water) & mix until it starts to form a dough. Then squeeze, knead & roll in your hands until it's a smooth, pliable ball of dough.
Lightly flour your work surface and rolling pin and roll out the dough to about 50mm thickness. Cut out shapes using cookie cutters, or freehand if you're a bit more skilled than I am. I left the surface of my shapes plain as I'm going to paint them. But I guess at this stage you could carefully etch patterns or designs into the surface.
Carefully lift your shapes, using a palette knife, onto a baking sheet covered in greaseproof paper. (A couple of my stars got stuck because I didn't flour my work surface properly). Punch out holes for hanging ribbons. (I used a sturdy drinking straw for this)
Bake in the oven for an hour on a low heat (say 60C) turning them over half way through. Then turn them out onto a wire rack and leave until completely cool. Leave for another 24 hrs before painting or varnishing, which hopefully we shall be doing this weekend....
For the Salt Dough You'll Need: 2 cups of Plain Flour, 1 cup of Table Salt, 1 cup Water (cool but not cold). Mixing bowl, rolling pin, cookie cutters, palette knife, baking tray, greaseproof paper, cooling rack.
You can mix up any amount of dough you like as long as you stick to this ratio. 2 parts flour to 1 part each of salt and water.
Method: Mix the flour and salt in a bowl. Make a well in the centre and pour in a little of the water and mix. Keep adding the water a little at a time, (You may not need all of the water) & mix until it starts to form a dough. Then squeeze, knead & roll in your hands until it's a smooth, pliable ball of dough.
Lightly flour your work surface and rolling pin and roll out the dough to about 50mm thickness. Cut out shapes using cookie cutters, or freehand if you're a bit more skilled than I am. I left the surface of my shapes plain as I'm going to paint them. But I guess at this stage you could carefully etch patterns or designs into the surface.
Carefully lift your shapes, using a palette knife, onto a baking sheet covered in greaseproof paper. (A couple of my stars got stuck because I didn't flour my work surface properly). Punch out holes for hanging ribbons. (I used a sturdy drinking straw for this)
Bake in the oven for an hour on a low heat (say 60C) turning them over half way through. Then turn them out onto a wire rack and leave until completely cool. Leave for another 24 hrs before painting or varnishing, which hopefully we shall be doing this weekend....
Labels:
Christmas tree decorations,
cookie cutters,
cookies,
crafting,
decorating,
decoration,
decorations,
diy,
homemade,
misc.,
recipe,
tutorial,
tutorials
Super Quick Handmade Gift Tags - Tutorial
I wanted to add a handmade touch to my shop bought wrapping paper,and these are REALLY quick and straight forward to do! I already had everything needed either in my stash, or by making more use of what I had already bought for my wrapping scheme. So not only will they match inperfectly, but they're low cost too.
Once you've assembled all your supplies, you could run a dozen of these up in 15 mins (not kidding, that's all it took). They're so so simple to do, and you can vary the materials to give dramatically different looks. You'll need: wrapping paper, pencil, scissors/craft knife, glue/spray mount, tags/card,buttons, ribbon/cord. (/=or)
First step is to cut your wrapping paper shapes . These can be as simple or as complicated as you like. Being a bit of a slave to a theme though, I decided on geometric Christmas trees. I drew the design out on the back first, layered several scraps of paper and cut them all in one go.
Then glue the shapes to your tags or card. You could add other embellishments. Beads, sparklies, glitter, you name it. Whatever tickles your fancy or ties in with your scheme.
Loop ribbon or cord first through the button, then through the tag, then loop the loose ends of the ribbon through itself behind the button and gently pull tight, until the button sits snug against the tag. Et voila! Simple cute and unassuming.
First step is to cut your wrapping paper shapes . These can be as simple or as complicated as you like. Being a bit of a slave to a theme though, I decided on geometric Christmas trees. I drew the design out on the back first, layered several scraps of paper and cut them all in one go.
Then glue the shapes to your tags or card. You could add other embellishments. Beads, sparklies, glitter, you name it. Whatever tickles your fancy or ties in with your scheme.
Loop ribbon or cord first through the button, then through the tag, then loop the loose ends of the ribbon through itself behind the button and gently pull tight, until the button sits snug against the tag. Et voila! Simple cute and unassuming.
Labels:
cards,
Christmas,
christmas gift,
crafting,
decorating,
decoration,
decorations,
gift,
gifts,
homemade,
recycle,
tutorial,
tutorials,
wrapping
Christmas Colour Palette
I bought my Christmas wrapping paper weeks ago. I don't tend to use "normal" wrapping paper. Preferring in the past to use poster paper, wallpaper, parcel paper, and florist cellophane to name but a few. I tend to like my wrapping to be a little outside the norm and look handmade. As if it's taken alot of time, thought and effort (which it usually has) if not alot of money (as we're seemingly always short of this!)
However the wrapping paper in question (above) was a mere 99p per 10m roll from Aldi (gotta love Aldi). So my money saving credentials remain intact. I've made my own gift tags to match (tutorial to follow) so my handmade credentials are also intact. Handily, I don't have to spend time agonising over a colour palette. It's all there in the wrapping paper.
A quick trawl through my supplies turned up these metallic red bells left over from last year's wrapping scheme.I incorporated them in my present toppers, so every time someone picked up their present, it would jingle in a festive fashion. Cute. I wired them with tigertail & bead crimps, so they're ready to use. Bit of time saved there, as that was a REALLY fiddly job last year!
I also love these traditional candy canes, so Ill fit these into my scheme too. Probably hanging on the tree ( but not on the door wreath!!). For some reason I'm loving childhood nostalgia even more since The Little Tornado came along. This year is his second Christmas,and I just know he is going to be sooo excitable come the big day.
I bought the ribbon from Ebay. (£6.20 inc P&P for 10m each of Red, Green & Turquoise and 40m of narrow white ribbon. Bargain I think!) I was a little worried about trying to colour match from an online photo but needn't have worried. They match perfectly, and she's a great seller.
I also dug out these china teacups that I've had stashed for a couple of years (yes, I know. My name is Portia, and I am a hoarder.). I think they'll make great festive teacup candles (tutorial here) and will fit beautifully into the scheme. I 've a few other things planned. Mostly with a bit of origami and some papercraft. Snowflakes, paper chains and the like. And so it begins.......!
However the wrapping paper in question (above) was a mere 99p per 10m roll from Aldi (gotta love Aldi). So my money saving credentials remain intact. I've made my own gift tags to match (tutorial to follow) so my handmade credentials are also intact. Handily, I don't have to spend time agonising over a colour palette. It's all there in the wrapping paper.
A quick trawl through my supplies turned up these metallic red bells left over from last year's wrapping scheme.I incorporated them in my present toppers, so every time someone picked up their present, it would jingle in a festive fashion. Cute. I wired them with tigertail & bead crimps, so they're ready to use. Bit of time saved there, as that was a REALLY fiddly job last year!
I also love these traditional candy canes, so Ill fit these into my scheme too. Probably hanging on the tree ( but not on the door wreath!!). For some reason I'm loving childhood nostalgia even more since The Little Tornado came along. This year is his second Christmas,and I just know he is going to be sooo excitable come the big day.
I bought the ribbon from Ebay. (£6.20 inc P&P for 10m each of Red, Green & Turquoise and 40m of narrow white ribbon. Bargain I think!) I was a little worried about trying to colour match from an online photo but needn't have worried. They match perfectly, and she's a great seller.
I also dug out these china teacups that I've had stashed for a couple of years (yes, I know. My name is Portia, and I am a hoarder.). I think they'll make great festive teacup candles (tutorial here) and will fit beautifully into the scheme. I 've a few other things planned. Mostly with a bit of origami and some papercraft. Snowflakes, paper chains and the like. And so it begins.......!
Snowflakes
I haven't used a crochet in something like 35 years, but when I saw those, I thought they were so cute, I had to make some! The Heart Handmade tutorial is so good, I figured it out all by myself and so can you. Each of them take about 15 minutes to complete once you get the hang of it, while watching a movie, you can whip up a half dozen. Which is what I did last night while Michelle Morgan and Jean Gabin smooched in Quai Des Brumes. Nice way to use leftover yarn!
Labels:
crochet,
decorations
Tabbed Kitchen Towels
Hello again!
I've finished more of gifts, some tabbed kitchen towels for my mother and aunt. They were super easy and quick to make since I used store-bought towels and just modified them. Check them out here.

I've also finished my Christmas tree skirt (although this one is for me).

Now I just have to start working on that drink holder for my brother...
I've finished more of gifts, some tabbed kitchen towels for my mother and aunt. They were super easy and quick to make since I used store-bought towels and just modified them. Check them out here.
I've also finished my Christmas tree skirt (although this one is for me).
Now I just have to start working on that drink holder for my brother...
Labels:
decorations,
sewing
Gifts for the Advent Calendar
This week the gift post is a bit different. I want to get ready for the 1st December where I am putting up my Advent Calendar. These days John and I buy a LEGO set and divide it into 24 parts for which I sewed 24 bags. But you can also just make some other smaller gifts to put in each bag. The tutorial today is about how to make the bags and you can have a look at the Pinterest Board for some ideas for other things to put in the bags.
What would you put in such bags?


Meet me on Grey Duckling
What would you put in such bags?
Meet me on Grey Duckling
Labels:
decorations,
lavender bags,
sewing,
tutorials
Christmas hearts and bunting
This week, amongst other crafty endeavours, I've been making some Christmas decorations.
I used this tutorial to make these heart decorations:
I'd already made a tiny string of them in pink just because, but using this chunky wool and a size 8 hook makes really cute big hearts. I think I'll make a lot of them and string them by the window.
I used red and white felt and a checked ribbon I found in my stash. I think it's quite cute, I'm going to put it underneath my wreath (when I finally manage to make one - I may just cave and buy this one from Paperchase). I haven't decided what to put on the blank pieces yet - thinking snowflakes on the red, but what on the white? A stocking? I think it should stick to the red and white colour scheme. What do you think?
Carly xo
Labels:
bunting,
Christmas,
crochet,
decorations
Fragrant Christmas Stars
Hey guys, I just put up my first tutorial, so I am feeling all proud and excited at the same time (I am very easily pleased) Check it out here
I have just realised its a month to go and I am still waiting on silk to be delivered so I can make my planned gifts. Slightly stressed! They may have to end up as New Years gifts instead, what with postage from Canada to the UK...
I'll get back to watching the snow, and the post box.
I have just realised its a month to go and I am still waiting on silk to be delivered so I can make my planned gifts. Slightly stressed! They may have to end up as New Years gifts instead, what with postage from Canada to the UK...
I'll get back to watching the snow, and the post box.
Labels:
decorations,
tutorial
Gifts for the Navigator
This is one of my favorite projects to date. I am a bit of a map enthusiast myself and I think this turned out really nice.


Do you want to see some more ideas for gifts for the navigator?
Check out my new Pinterest board with ideas.
Do you want to see some more ideas for gifts for the navigator?
Check out my new Pinterest board with ideas.
Labels:
decorations,
furnishings,
tutorials
Bonjour!...and some advent bunting
Hello everyone, I'm Zoë and I blog over at onerainyafternoon.
Last year I made Christmas presents for nearly everyone I knew which was fun but very, very tiring....! So this year I have cut it down somewhat a little. But more on that another day as today I am talking advent and, to be more precise, advent bunting.
I saw this in a magazine a couple of years ago and made it up as I went along. In the magazine the photos were styled with fairy lights draped along the top and some sprigs of holly, mistletoe and fir tree sticking out of some of the pockets. Unfortunately my fairy lights are hidden in a box at the back of a very dusty and dirty garage and it is blowing a gale and tipping it down so my intentions of doing a similar styled shoot went to pot (I know, laziness will get me no-where, but waiting to find all of those things, putting it all together and then taking photos will get you no blog post ....)
Anyway, on with the photos
Last year I made Christmas presents for nearly everyone I knew which was fun but very, very tiring....! So this year I have cut it down s
I saw this in a magazine a couple of years ago and made it up as I went along. In the magazine the photos were styled with fairy lights draped along the top and some sprigs of holly, mistletoe and fir tree sticking out of some of the pockets. Unfortunately my fairy lights are hidden in a box at the back of a very dusty and dirty garage and it is blowing a gale and tipping it down so my intentions of doing a similar styled shoot went to pot (I know, laziness will get me no-where, but waiting to find all of those things, putting it all together and then taking photos will get you no blog post ....)
Anyway, on with the photos
Each square of bunting is actually a little pocket/bag to be filled with goodies!
You, obviously, need 24 little pockets!
I will be back in a few days with home-made ideas on what to put in the pockets. In the meantime, happy crafting and thanks for having me!
Labels:
children,
decorations,
introduction,
misc.,
sewing
Papercuts and Postcards
Hello everyone, I'm Lauren from Sewing Me, Sewing You. I thought I'd drop by to post some ideas I want to work on for Christmas prezzies - so far they are only ideas and I haven't actually got round to starting any of them.
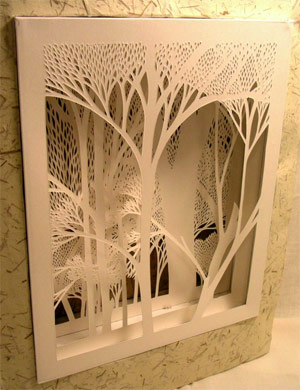
The first one is papercutting. I saw an article in the Guardian about Rob Ryan and fell in love with what he does. I'd like to try my hand at paper cutting, though with a much simpler design than his which are like this...

I also like this from Green Chair Press blog...

The second idea was to create a set of personalised postcards, by buying plain blank ones and drawing, stencilling or decorating the postcards while leaving the address/message side blank for the recipient of the present to use, thus spreading the joy to others!
I'll post some pics if I manage to do either!
The first one is papercutting. I saw an article in the Guardian about Rob Ryan and fell in love with what he does. I'd like to try my hand at paper cutting, though with a much simpler design than his which are like this...
I also like this from Green Chair Press blog...
The second idea was to create a set of personalised postcards, by buying plain blank ones and drawing, stencilling or decorating the postcards while leaving the address/message side blank for the recipient of the present to use, thus spreading the joy to others!
I'll post some pics if I manage to do either!
Labels:
cards,
decorations,
furnishings,
introductions
crafty christmas zine & home decor
Hi again, it's Emily from seymour. While scouring the internet today, I found a really neat webzine from Creature Comforts called Gifted, all about Christmas gifts & decorating for the holidays. There are lots of fun looking tutorials/ craft ideas to get you inspired! A few of the holiday decorating projects reminded me of things I had made in years past, so I thought I'd share (not really gifts, but easy and fun!) :
For this snowflake mobile, I ripped strips of muslin and tied on white odds and ends; pom poms from leftover yarn, regular paper & vellum snowflakes and white metal belt buckles. The more eclectic the odds and ends, the more fun! I bent a wire hanger, wrapped it with muslin strips and tied everything on. There's a mobile in Gifted that's got snowflakes hanging from a piece of driftwood and it's beautiful!
Another project in the zine (candles in mason jars) reminded me of this cider jug light I made... but I can barely call it a project! If you're decorating a room with light strands and have a big long tail leftover, find a glass container to hold it- the lights look really pretty through the glass!
Labels:
decorations
Subscribe to:
Posts (Atom)