Showing posts with label children. Show all posts

Toddler Aprons

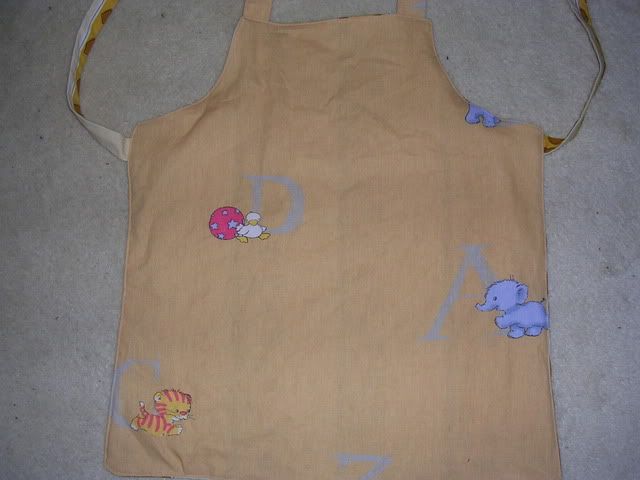
I had the intention of making my niece a stuffed animal, but as I was working on it, I realised that it was indeed for my son, not my niece. Inspired by my sister's Facebook status that they were baking, I decided to make her (my niece that is) an apron instead. And while I was at it, I also made one for the other niece (my boyfriend's niece, really). They're 1.5 months apart in age so I could the same pattern.


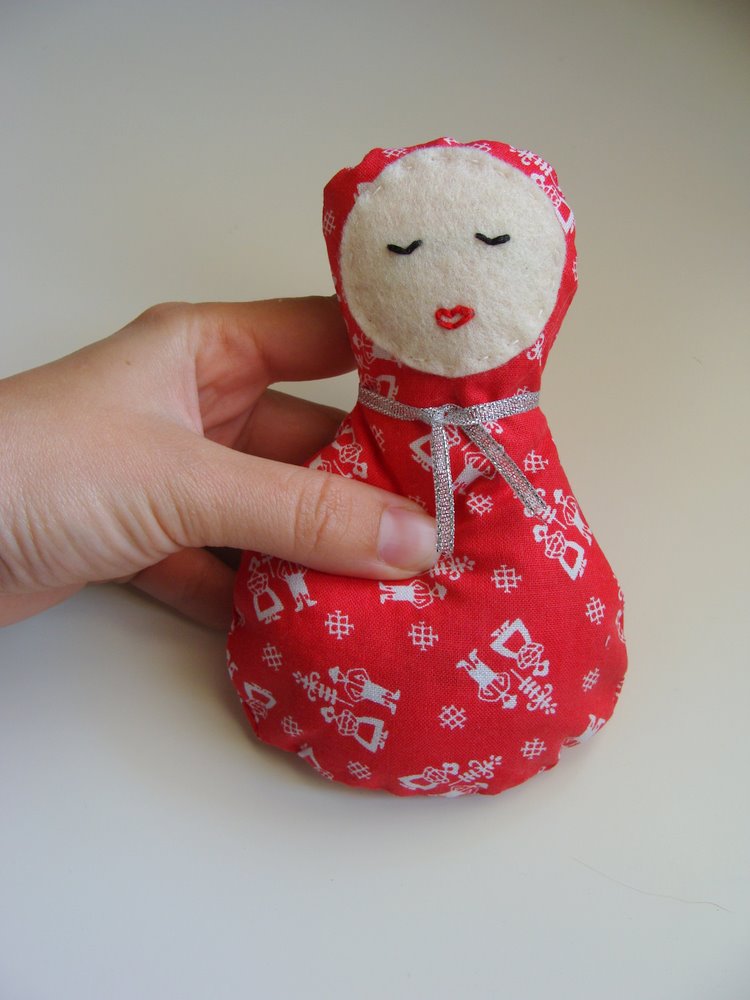
I had the intention of indivivually choose fabrics, but in the end they got identical ones. Niece L is more "pink" and niece A more unisex, but I didn't care for the pink fabrics at all. They are reversible with this giraffe stripes for one side, the cool side.
The cute side has small animals and numbers and letters on it. So the girls can choose if they want to be cool or cute. Both fabrics are pretty heavy, so I'm sure they will work for cooking, baking, painting and other crafts.

I used this tutorial, with the suggested changes.

Blogged here and here.

Baby quilt


I've just finished this quilt, made for my baby niece. It's made with a selection of super soft Cloud 9 flannels which were in a quilting pack, complete with simple instructions for the faint hearted, that Saints and Pinners kindly sent me to test out. It took about three evenings to make, not bad for my first quilt. I did take a hefty short cut though, topstitching the edging on the machine rather than slipstitching by hand, which resulted in some rather wonky stitches... but hey, it's "charming"! It's so soft and snuggly - I can't stop cuddling it. More details on my blog.

Finished scarves


I have really been enjoying seeing what everyone else has been making and am feeling inspired. I made the bunting above as a birthday present last week but added it here as a Christmas present idea. I used up a load of scraps to do it, and some old shirts!

I have finished three ( two red, one green) of the scarves I initially posted about. They are easy and quick to knit. There is a loop on each side of the scarf to push the ends through and initially the dividing stitches for this was tricky but I've got the knack now! The pattern is here

Comic book jacket

I created this Christmas present in October. It is not entirely handmade, it is more of a customisation. The gift is for a 6yr old boy. I purchased a plain denim jacket from an eBay seller, and a Gold Coast Movieworld t-shirt from Salvos, cut into a square, used bias strip for the border, and here it is:


The 'before' picture


Also detailed on my blog.

I've sent this off this morning to my friends boy in the UK from Australia, and sincerely hope it does not go missing in the mail! I will be heartbroken!

First time making christmas gifts...

Hello! My name is Erica, and I write two blogs, the first is Recycled Fashion, which encouraged me to learn to sew, and my second Recycled Sewing, which documents my sewing crafts, ideas and inspiration.

I've only started sewing in the last few months, so this is the first year I will be making gifts for Christmas, but wow, what a great feeling to make rather than buy!

So far, I have made the following:

1. Mini tie t-shirts for my friends boys. Using thrifted mens neckties, cut to size, ironed and machine stitched into place:


2. Chalk mats made from thrifted fabric:


3. Plastic bag holder/dispensers made from vintage teatowels:


I've made a doily rosette for my sister in law too, but I forgot to take a picture before I posted it to the UK, doh!

I am constantly inspired by reading all of your wonderful ideas on Crafty Christmas Club!

Bonjour!...and some advent bunting

Hello everyone, I'm Zoë and I blog over at onerainyafternoon.

Last year I made Christmas presents for nearly everyone I knew which was fun but very, very tiring....! So this year I have cut it down somewhat  a little. But more on that another day as today I am talking advent and, to be more precise, advent bunting.

I saw this in a magazine a couple of years ago and made it up as I went along. In the magazine the photos were styled with fairy lights draped along the top and some sprigs of holly, mistletoe and fir tree sticking out of some of the pockets. Unfortunately my fairy lights are hidden in a box at the back of a very dusty and dirty garage and it is blowing a gale and tipping it down so my intentions of doing a similar styled shoot went to pot (I know, laziness will get me no-where, but waiting to find all of those things, putting it all together and then taking photos will get you no blog post ....)

Anyway, on with the photos


Each square of bunting is actually a little pocket/bag to be filled with goodies!


You, obviously, need 24 little pockets!


I will be back in a few days with home-made ideas on what to put in the pockets. In the meantime, happy crafting and thanks for having me!

Big list this year, time to get cracking!

Hello everyone, my name is Kath and I live in Brisbane, Australia. I have far too many hobbies to list but my most recent endeavour has been my Etsy store bunnyhornet. I make vintage inspired jewellery there and I'll be adding a bit of that to my Christmas pressies list!

BUT!! My projects I have to tackle this year are:

1.    3 x personalised cushion covers for my nephews.
2.    3 x reversible tote bags
3.    Skirt for my sister-in-law
4.    Sundress for another sister-in-law
5.    A few simple make-up cases
6.    Flying pigs mobile (idea found on this blog!)
7.    Some little bunnies (also idea found on this blog - thanks!)
8.    Tuxedo bib for littlest nephew
9.    2 x capes for bigger nephews
10.  3 x aprons for sisters and mother-in-law
11.  Giraffe Toy

OMG! How am I ever going to finish? I don't have a blog of my own so I'll document my sources for inspiration etc here :)

1. Personalised Pillows

My sister-in-law sent me a link for this:


If you click on the picture it will take you to the webiste.

She wanted her own version for her new baby and I have two other little nephews so I've bought fabric for all three and some felt for the names.

I bought my fabrics from Superbuzzy who has some amazing prints and colours.


And the felt came from Etsy user litlbrownbird.

And this is the inspiration for colour scheme I'm working with!

How cute is he!

The fabric picked for Boy 1 is to go with this little fella and I think the oranges and blues will go nicely with his room....

I want to make one similar but that's only in the 'musing' stages at the moment, no concrete plans!

You'll also notice I've bought the fabrics for the 3 reversible totes. The pattern I'll be using is from Burda Style and is free!


Now this tuxedo bib pattern is meant to be for an adult (to look like you're wearing a tux shirt) but how cute would a version be for a baby? Argh! So cute! Another Freebie!

I'll also use some of the leftover fabric for the make-up cases. I'll just make these really simple pouches with a zip closure.


Love this tutorial over at Chezlin!

I also bought some of that felt to make brown bunnies like the ones shown on the blog and on the original website of Betz White.


 The flying piggy mobile I found on this blog here. I've already started on my own pattern - don't want to mess with copyright but as it's for a gift we should be ok! The skin tone and white felt I've bought from litlebrownbird will be for this one.

Ok, and that's where I'm up to with my ideas so far..... wheeeeeeeeee!

Now to find good patterns for the Sundress, the Skirt, the aprons and the capes. Any ideas?
A Little Smock

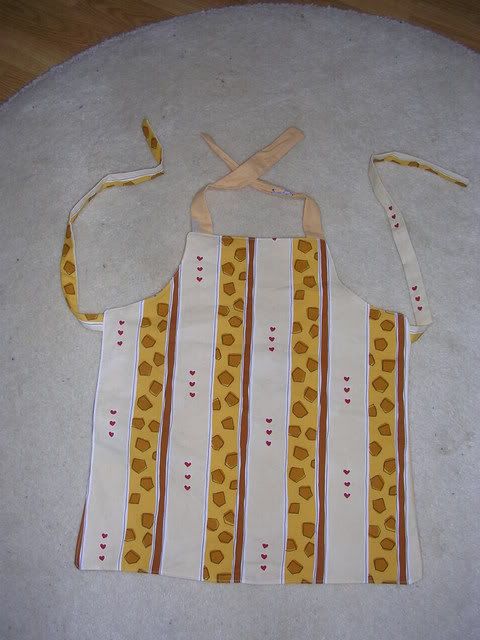
I love making this little vintage smock for the little girls in the family. The pattern is free and easy to adapt and personalise. In the past I've made it reversable, with pockets, in plain and print fabrics. It has come out fantastic every time. You can get the pattern here at Mayfly.

This time I have made a little smock for one of the many little girlies in the family out of a single layer of retro print cotton and vintage candy stripe bias binding. I used a single layer this time so it can be worn over a shirt or dress or as a lightweight summer top on its own. Because the pattern is a single piece it is super quick and easy. The odd shape above crosses over at the back and ties at the shoulders.

Lavender ladies tutorial

Wow, look at all these great handmade gifts already! I thought I would share with you a simple, quick gift to make.


These sweet little lavender ladies are a modern take on the old fashioned lavender bags that go into your underwear drawer or under your pillow. They make perfect gifts for friends, teachers, colleagues or ‘secret santa’ (Kris Kringle) gifts.

To make a lavender lady, you will need:
Fabric of your choice (approx 2 x 20cm square)
Felt to make the face
Embroidery thread
Needle for embroidery
Sewing machine or needle and thread
Pins
Dried lavender (you will find it in craft shops or health food shops)
Stuffing


To begin, fold your fabric over with the wrong side showing. You don’t need a pattern, just draw two overlapping circles straight onto the fabric (use chalk or pencil though, I used a marker so that you could see it in the photo). For my lavender lady the big circle’s diameter is 12cm and the smaller circle’s diameter is 8cm. It doesn’t need to be perfect though! Cut out your little lady and put aside.


Next, cut out a little round face from the felt. Again, just draw the circle straight onto the felt and cut it out. Mine is 4.5cm in diameter. Stitch on some little eyes and a mouth using embroidery thread. If you are making a few lavender ladies, try stitching different expressions on them.


Stitch the face straight onto the head of the body.


Now, lie the two body pieces right sides together and pin them securely. See those two pins at the bottom? They are very important! This is the gap you are going to leave so that you can stuff the body. Stitch the two body pieces together using a sewing machine or hand sewing. Don’t stitch across the gap.


Turn your lavender lady inside out. Looking cute, isn’t she? Start to stuff your lavender lady, alternating between stuffing and spoonfuls of lavender. All up, I put about 5 tablespoons of lavender in mine.


Once she is all stuffed, hand sew the opening at the bottom together.


And there you have it – a very sweet little lavender lady. I tied a little ribbon around her neck to make her look a bit more festive.